
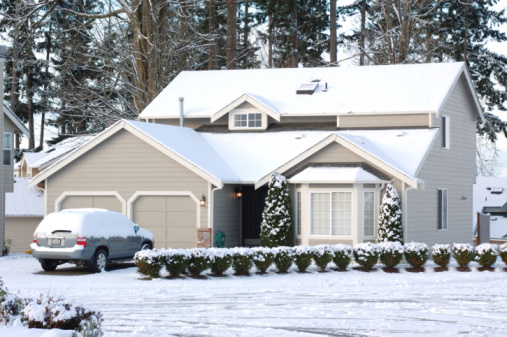

Ice dams and frozen pipes are two of the most damaging disasters that can strike your home in the winter. Ice dam removal can cost up to $875, assuming it doesn’t damage your home. And the average cost of water damage from frozen pipes is around $15,000. Learn how to winterize your home to help prevent ice dams, frozen pipes, and sky-high heating bills.
Prevent and Treat Frozen Pipes
When the water inside of a pipe freezes and expands, it can crack the pipe. Pipes located outdoors or in unheated areas of your home are more likely to freeze and crack. This includes piping used for outdoor swimming pools, water sprinklers and hoses, as well as pipes located in the basement, attic, garage and crawlspace.
When the colder months start moving in, be sure to drain any outdoor pipes that will no longer be in use during the season. You should also remove, drain and store any outdoor hoses. Even outdoor hoses can freeze and crack in the cold winter months, especially if they still contain water. Do not put antifreeze in these lines. Antifreeze in water lines is damaging to the environment and is poisonous to people, pets and wildlife.
If possible, insulate pipes in the unheated areas of your house. Use piping insulation in the form of piping sleeves, heat tape or even newspaper. According to the Red Cross, even a quarter inch of newspaper can protect pipes that are occasionally exposed to freezing temperatures. Consider placing a space heater near pipes if you’re concerned they will freeze during a cold snap—but only do this if you’re piping insulation isn’t flammable.
There are simpler, less invasive ways to prevent frozen pipes. You can open cabinets and doors so that warm air can reach adjacent plumbing. It’s also a good idea to let water slowly drip from the faucets that are susceptible to freezing. Doing this keeps the water moving and reduces the chance of it freezing in the pipes. And although you’re focused on keeping your heating bill down, don’t set the thermostat too low. Anything below 55°F greatly increases the risk of frozen pipes. If you have pets in your house, don’t set the temperature below 68°F. And if you’re unsure of what to do, speak to a plumber to find out the best ways to protect your pipes from freezing.
If you run the faucet during cold weather and no water comes out, you may have a frozen pipe. To thaw the pipe, first open the faucet. Next, try to locate the point where the pipe is frozen. This could be a crawl space or basement. You can place a space heater near the pipe if there isn’t one nearby already. You can also gently heat the pipe with a hairdryer, assuming you can safely get close to it. Contact a plumber if you cannot thaw the pipe or if it looks bulged or cracked.
Prevent and Treat Ice Dams
An ice dam is a wall of ice that forms at the edge of the roof. It causes melting snow (water) to pool on the roof and prevents it from draining into the gutter. This water can eventually leak through your roof and damage your home. Often, ice dams are the result of insulation problems in your roof and attic. If heat is escaping through your attic and your roof, it can cause the snow above it to melt. When the melted snow gets closer to the overhang of your roof where it is cooler, it re-freezes creating an ice dam. There are several ways to prevent ice dams from forming on your roof and other ways to remove them if they do occur.
The first step to preventing ice dams is properly insulating your attic. Cracks in drywall and gaps between fixtures can cause heat to leak into your attic. This heat can cause the roof to warm and melt snow. You can plug these leaks by going into the attic, lifting the insulation and sealing any cracks with caulk. You’ll want to do this in the cooler months. Your attic could be unbearably hot in the spring and summer. Wear a respiratory mask, long sleeves and gloves. This will protect your lungs and skin from insulation fibers. Or, if you’re not comfortable doing this, call in a professional.
Checking for heat leaks in your attic is important especially if you made modifications to your home in the last year. Something as simple as a new lighting fixture can create a breach in your drywall. This breach can allow heat to escape into your attic. Modifications, such as skylights, can create problems with the ventilation in your attic. This can dramatically change the airflow and temperature in your attic. Ask a contractor if any of your recent modifications may have altered the insulation or ventilation of your attic and take steps to correct them.
You should also check whether you have fiberglass or cellulose insulation. That insulation should be 12 to 14 inches thick. If you have less than 8 inches of insulation, you will want to make some updates. If possible, use blown-in insulation instead of hand placed bats. Blown-in insulation can fill small spaces in your attic better than bats can.
Even if you take these steps, an ice dam may still form. If you notice ice or icicles forming on the edges of your roof, there’s a good chance you have an ice dam. You can purchase an ice dam rake to remove the dam. This is a telescopic rake that allows you to scrape snow and ice off your roof without getting onto a ladder. You can also hire someone to get onto your roof and shovel the snow off. If you prefer the latter option, contact a landscaping business. They typically handle ice dams. Don’t use a leaf rake or shovel to try to remove the ice dam, and don’t climb up on your roof yourself.
5 Quick Tips to Save on Heating Costs
1. Run Fans in Reverse
According to Energy Star, running a fan clockwise in the wintertime can help reduce your heating bill. A fan rotating in that direction will create an updraft, forcing warm air down.
2. Fix Drafty Doors
A draft snake fits along the bottom of your door and helps prevent cold air from passing into a room. You can buy draft snakes at hardware and home goods stores or you can make your own. Simply roll up a bath towel and place it at the bottom of the drafty door. It is especially important to use a draft snake if your thermostat is near the door. Cold drafts can trigger the thermostat, causing the heat to turn on when it may not be necessary.
3. Add Window Plastic
You can buy window insulation kits at hardware stores and install them yourself. Window insulation kits come with double-sided tape and sheets of plastic meant to fit to the inside of your window casing. These help to reduce drafts that may come through the window. They also add a pocket of air between the window and the plastic which provides another layer of insulation. The only downside is you can’t open that window until you’re ready to remove the plastic insulation.
4. Lower Your Thermostat at Certain Times
According to the U.S. Department of Energy, you could save up to 10% on heating costs per year if you turn your thermostat a few degrees down for just 8 hours a day. You could even do this automatically if you install a programmable thermostat. These devices lower the temperature when you’re asleep or away from home. Programmable thermostats also allow you to pre-set a schedule so that temperatures return back to normal when you wake up or return home, so you don’t have to sacrifice comfort to save energy.
5. Take Advantage of State-Specific Offers and Rebates
If you’re shopping for energy-efficient products for your home, ask the retailer or your local utility company about rebates or incentives offered in your area. You can also access the Database of State Incentives for Renewables & Efficiency to check out any policies or incentives specific to your state.
Get Started to Winterize Your Home
A good strategy to winterize your home can help prevent ice dams and frozen pipes, and also cut heating costs. Start the process to winterize your home in the fall and you’ll have plenty of time to seal drafty areas, upgrade or add insulation and schedule professional services.
Read more: 12 Tips to Ice Out Ice This Winter

Muchas gracias, muy buenos consejos, los pondré en práctica.
Thank you for caring.
We get ice dams every year. But we have gutter guards all around the house to prevent leaves clogging up the gutters. Should the guards be removed for the winter?
I really appreciate all the information on protecting our homes during the fall and not waiting till problems occur. Thank you sincerely.
You’re welcome!
I JUST WANTED TO SAY THANK YOU FOR ALL OF THE GREAT ADVICE AND FOR GIVING ME THE PRIVELEDGE OF HAVING AARP FOR MY HOME AND CAR INSURANCE. YOU GUYS ARE ALWAYS SO HELPFULL.
Cheryl – Thanks for the kind words and for being a customer. We’re so glad you’re happy. Thanks for reading Extra Mile. Happy New Year!