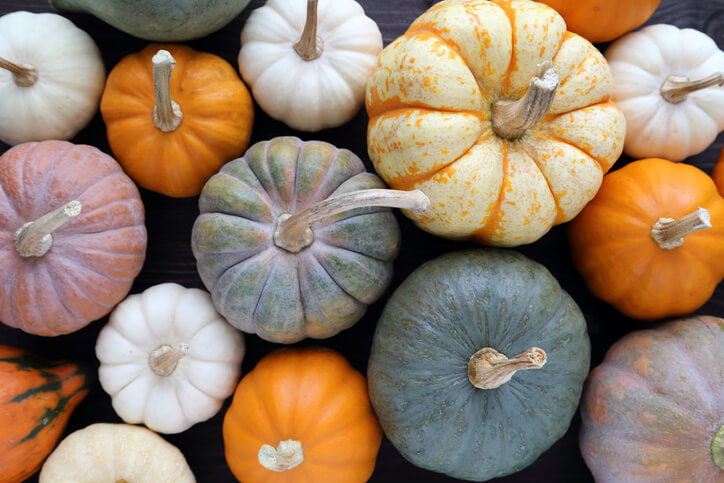

If you love pumpkins, it’s easy to spice up fall home décor with the orange squash. And there’s no need to spend a fortune on decorations, either. Even if you’re not crafty, it’s simple to cultivate your very own pumpkin patch of style with these fun and easy DIY pumpkin fall décor ideas.
1
Pumpkin Vase Thanksgiving Floral Centerpiece
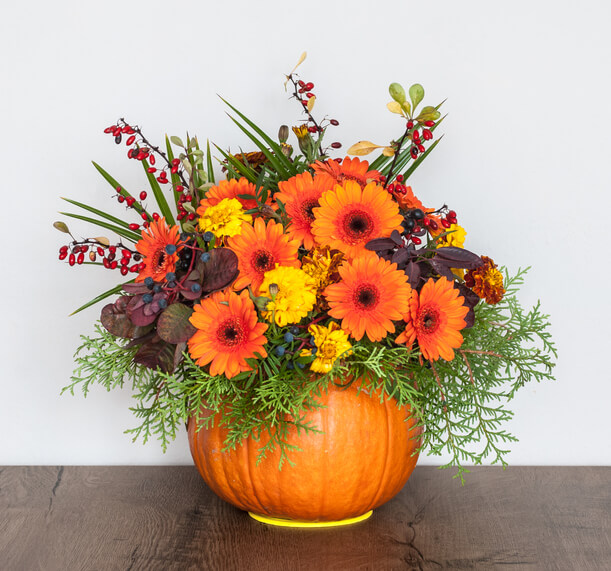
This floral centerpiece pumpkin project comes from Adrienne Carrie, blogger at Crafty Little Gnome. To create the pumpkin vase:
- Cut the top off the pumpkin (scooping out insides if using a real pumpkin).
- Insert a bowl of water.
- Make a tape grid across the top to hold the flower stems upright.
- Insert greenery and flowers.
“Using a real pumpkin looks more natural and is usually cheaper and easier to acquire than a fake pumpkin,” says Carrie. “However, the benefits of using a fake pumpkin is that it will last forever and you don’t have to deal with the mess of carving a real pumpkin.”
Customize this pumpkin vase with your own floral and greenery choices, fresh or artificial, and you’ve got an eye-catching fall centerpiece or a festive gift for a holiday hostess.
Find complete instructions on Crafty Little Gnome.
2
Dry-Brushed Chalk Painted Fall Pumpkins
You may not be the first of your friends to chalk paint a pumpkin — but you could become a neighborhood pumpkin pioneer by implementing this dry-brush technique from Jamie Hoover and her house and home blog anderson + grant.
For this project, use two coats of shellac-based gray primer so bright dyes on faux pumpkins won’t bleed through a lighter color of paint. Then put light mint or darker green color chalk paint on a brush, wiping most of it off before applying quickly and haphazardly. Shades of black or gray add a nice touch, highlighting and accenting plastic pumpkins to make them look more real.
You could use fresh pumpkins for this DIY project, but keep in mind that you can reuse plastic pumpkins year after year. “My favorite place to shop for faux pumpkins at a good price are craft stores because they generally have a realistic shape and nicer stems,” says Hoover. “But, you can even find fake pumpkins at the dollar store that will look great once painted.”
For complete instructions and dry-brush tips, visit anderson + grant.
3
Pumpkin Spice Soy Essential Oil Candles
Pumpkin itself is fairly bland, but when you add spices such as cinnamon, ginger, nutmeg, allspice and cloves, that’s the pumpkin pie taste we all know and love. We also like the way a pumpkin pie baking in the kitchen smells, so why not fill your home with that spicy aroma throughout fall?
Quality scented candles are pricey and may contain ingredients that could set off allergies or respiratory problems. But you can easily make your own scented candles with this DIY recipe for Pumpkin Spice Soy Essential Oil Candles from Country Hill Cottage lifestyle blog.
All you have to do is:
- Melt soy wax flakes in a wax melting pot, double boiler or microwave.
- Then add a combination of essential oils such as cinnamon bark, nutmeg, ginger, clove bud and allspice (or one ready-made purchased “pumpkin spice” essential oil).
- Secure wicks in jam or mason jars, then pour wax.
- Let cool and decorate with cinnamon sticks or other whole spices and pumpkin spice.
“You can easily make three to four candles at a time,” says Country Hill Cottage co-founder Cyna Riley-Rank. “It’s important to use enough wax and essential oils to achieve beautiful and great-smelling candles. We recommend buying high-quality, organically sourced essential oils from a reputable company.”
For full instructions and candle-making tips for Pumpkin Spice Soy Essential Oil Candles, visit the project page at Country Hill Cottage.
4
Marbled Indigo Pumpkins
You can use either real or fake fall pumpkins to create these swirly designs from home design and DIY blog Alice & Lois. All you need is mini white pumpkins, a bottle of indigo nail polish, stir stick and a plastic container for water — and maybe a grandchild or two to help.
“This is a simple and fun project to do with kids,” says Sara Albers, who co-founded Alice & Lois with twin sister Melissa Fenlon. “Just don’t forget to wear rubber gloves.”
- Fill the container with lukewarm water (not cold, which will cause the nail polish to sink).
- Add four or five drops of indigo blue nail polish.
- Stir the polish on top of the water.
- Dip and spin the pumpkin.
- Let it dry on wax paper.
For full instructions and a video tutorial, visit Alice & Lois.
5
Fabric Covered Pumpkins
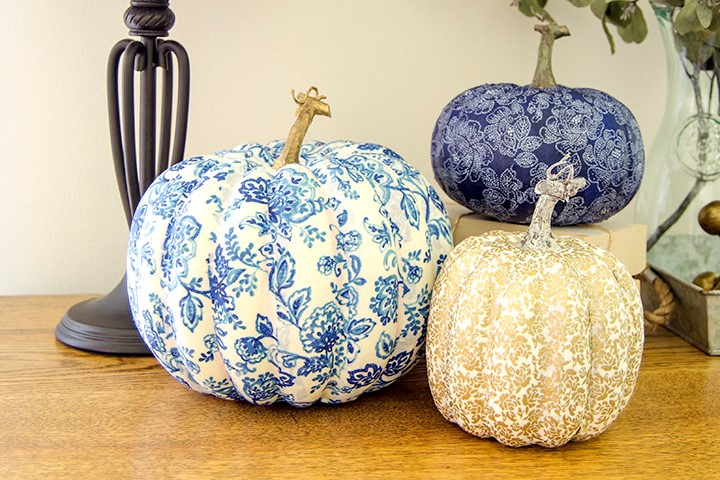
Are you a lover of fabric-covered pumpkins but intimidated by needle and thread? This fabric-covered faux pumpkin idea from crafting and decorating blog unOriginal Mom founder Meredith LeRoy is easy — with no sewing required. These pumpkins can be as whimsical or traditional as you like, depending on the fabric you choose.
To make fabric-covered pumpkins:
- First remove the stems.
- Cut fabric into 1.5″ to 2.5″ strips, cutting points on both ends of each strip to help the fabric lay better.
- Then paint the back with Mod Podge or a similar adhesive and apply to the pumpkin, smoothing from top to bottom.
- Next, coat the fabric with more Mod Podge and reattach the stem.
For complete instructions, visit unOriginal Mom.

Your updates are high quality and interesting however I think if you start sending too many they’ll become common place and I’m afraid I’ll begin to just skim them or delete them so, when you send out important information it may be deleted when I should read it. Everyone receives a lot of company updates and the Hartford is a quality company and the information you send out is important. I’d keep the information and updates product specific and safety specific with information I need.
I found this article very informative. Truly enjoyed it and shared it with some friends.
Love the craft info, keep them coming
Love the craft info, keep them coming.
how about Christmas crafts.